

Do you work in the concrete industry? If so, then you know that getting your job done is only half of the equation. The other half is ensuring that your finished product is up to code and passes inspection. Whether it's customer satisfaction or the law, most people want their newly poured concrete surfaces free from defects. But how can you make sure this happens?
That's where surface preparation comes in. To help out with this important process, we've compiled a list of our top tips for preparing your surface before pouring new concrete or resurfacing an old one. Read on for these helpful hints.
Equipment for Proper Surface Preparation
You can't start surface preparation without the right equipment. This includes tools such as a concrete saw, chisel pliers, and jackhammers. Depending on your project needs, you might also need a power planer for larger jobs or an angle grinder to smooth out rough edges.
Survey Your Surface for Preparing Concrete
Before you start any surface preparation, it's a good idea to get a full survey of the area. This means walking around and checking for cracks or other major damage that will need to be fixed before you can pour your new concrete. You should also note where rebar is located in the foundation so that when they are exposed during prep work, they won't interfere with formwork installation later on down the line.
Remove Debris from Surface
After noting all areas of concern, take some time to remove debris such as rocks and bricks lying near your site. If there is grass growing in the area where you'll be pouring concrete, then go ahead and mow it now while it's still dry outside (mowing wet turf creates clumps of sod that can be difficult to remove).
This will save you a lot of headaches down the road if you have an area with loose dirt or rocks and don't get them all cleared away. You also want to ensure that no sprinkler heads are in the way before getting started since they should stay undisturbed during concreting work. It's important not to cause any damage while doing this step, so we recommend taking your time and being thorough about it.
Remove Existing Coatings and Sealers
If there is an existing coating on the surface, such as paint, for example, then it should come off before you begin working. Removing these types of coatings and sealers will allow new concrete to properly adhere and bond to the foundation without any problems down the line.
Also, keep in mind that some contaminants may not be immediately visible – they could linger underneath old paint, certain caulks, etc., so we recommend getting rid of them all to play it safe.
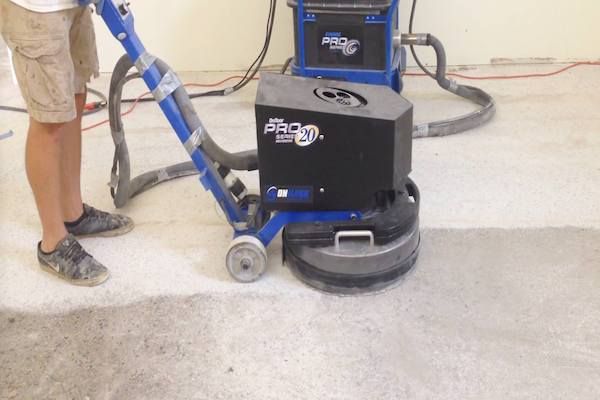
Surface Roughening for Concrete
Once you've gone over the surface and removed any loose debris, it's time to start preparing the foundation. Your first step will be to roughen up your concrete so that new cement can stick effectively. This is done using a stone texture tool or polishing pad on an angle grinder (or by hand for smaller jobs). You want to give the area where you'll be pouring additional strength and adhesion.

Chemical Methods for Concrete Surface Prep
You can use a chemical solution to help with surface preparation as well. There are many different types you can try depending on the look and feel that you're going for. For example, if your concrete is very porous, then using acid will likely be best since it eats away at all of those tiny holes to create a smoother finish that looks more polished.
More often than not, though, people want their new concrete surfaces to have more texture rather than being perfectly smooth, so they opt for something like an etching product instead. Either way, make sure you read up on how these chemicals work before getting started.
Acid Etching for Concrete
Acid etching is a popular way to prepare concrete surfaces for new cement. The chemicals are applied with special sprayers, which you can rent if needed, and the process usually takes around two hours or so, depending on how large your area is. You'll want to protect yourself from these types of products by wearing gloves along with goggles and an air mask at all times during application.
You also need to make sure that any other machinery in the area (such as lawnmowers) has been moved before getting started since acid etch will destroy them otherwise. At least thirty minutes should be allotted after applying this product before allowing anyone back into the work zone, too – it's important not to track any hazardous material through previously uncontaminated areas.
Once you're finished, clean any excess chemicals from the surrounding area and let it dry out thoroughly before continuing to the next step in your project.
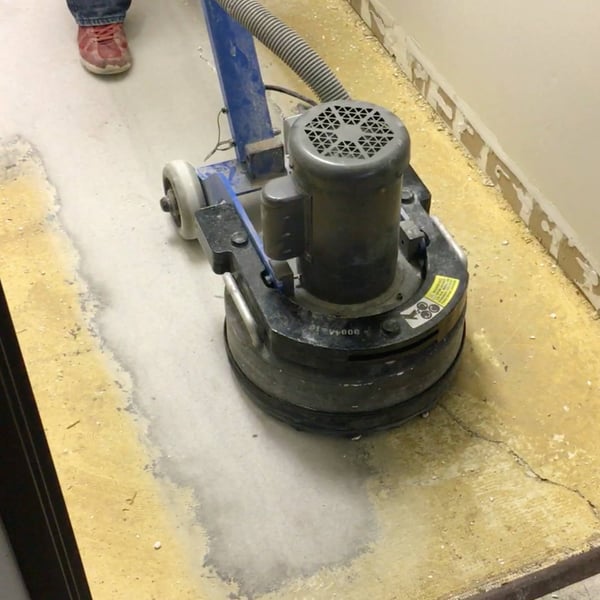
Polishing Concrete for a Properly Prepared Surface
If you want an even smoother finish with no texture at all (like if you plan on using tile), then polishing concrete is the way to go – this also leaves behind less dust since there's no sand involved, like when texturing concrete. To polish new cement properly, we recommend renting or buying a machine that allows water and grit to spin together as they come into contact with your surface. This gives off quite a lot of heat but leaves behind very small particles that abrade away imperfections pretty easily without creating too much dust.
As with acid etching, you need to protect yourself during this process, so make sure to wear long sleeves along with gloves and goggles at all times – prolonged exposure can cause chemical burns on the skin if proper precautions are not taken.
Plastic Sheet Method for Concrete Surface Prep
If you don't want to use chemicals or other harsh detergents, there is another option: plastic sheeting.
The most common way to do this method involves carefully laying out sheets of plastic, with each overlapping about half its width over the last piece like shingles on a roof. Then make sure everything stays down by stapling it along all sides before filling sections between layers with water. This step ensures that the concrete doesn't seep underneath when being poured onto your slab, so any debris will get filtered away instead of staying stuck in the concrete.
Once you've finished filling up all of your plastic seams, wait a few hours for everything to dry out, and the debris will lift right off when you pull it away from the surface. Afterward, go ahead and vacuum or sweep up any leftover dust to get a nice clean finish ready for your new slab once it's poured. If stubborn residue spots don't come off with water, try using an adhesive remover solution instead since it should do the trick without damaging anything underneath.
Inspect Your Area Once More Before Getting Started
Before starting concrete preparation work, go through one final check to ensure that all of the old concrete and other surface contaminants were removed, there are no loose rocks or debris, and everything is to begin. Once you get started, it can be difficult (not to mention costly) if something needs to be removed later down the line since this will significantly delay your project's completion date.
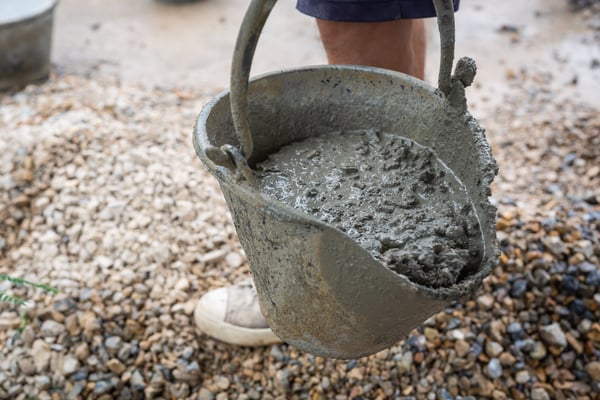
Mixing Concrete So It's Ready for New Cement
Now that your concrete surface is prepared properly, it should be ready for new cement! However, before mixing up any batches of fresh material, there are a few things you'll want to check first: does your area have enough drainage installed? Will or has rain been falling in the area where you plan on working according to weather forecasts? How about wind speeds; will they create problems while setting new cement? Any questions like these are important to consider before getting started so that you can plan accordingly.
If all of these factors seem okay, then it's time to start mixing up your concrete! We recommend using a mixer for this process since they typically do the best job of thoroughly incorporating sand with cement along with water to create that perfect mixture that is both strong and durable yet also malleable enough when fresh. Once everything has been mixed together properly, pour some out onto your surface area (usually about four inches deep) until it reaches the edges, where new cement will be poured into place soon after.

Connect with us
Recent Posts

WANT 10% OFF YOUR FIRST ORDER?

0 comments