
How To Paint a Brick Fireplace
The fireplace is almost always the centerpiece of the room —all furniture and decor tend to revolve around it. If you don’t happen to be head over heels for yours, chances are you won’t ever really love that room. The most effective and satisfying way to remedy the problem? Update the interior with paint.
What You Need
Materials
- Cleaning supplies (vinegar + water, nylon scrub brush)
- Dropcloth
- Painters tape
- Paintbrush
- Small paint roller for textured surfaces
- Primer
- Flat or Satin topcoat
Instructions
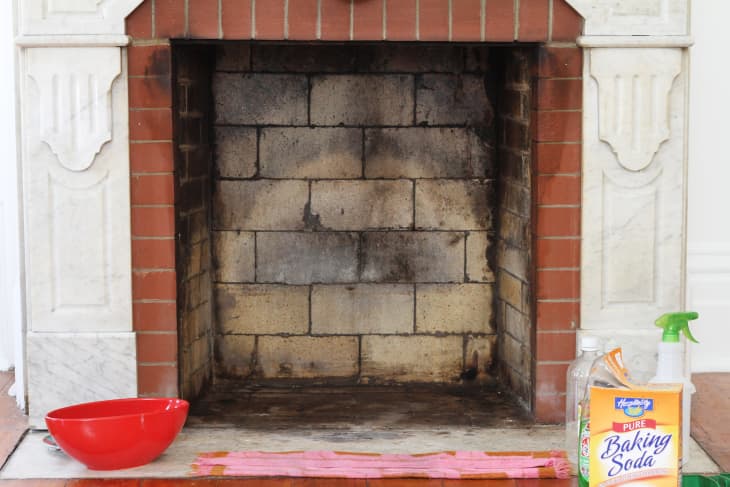
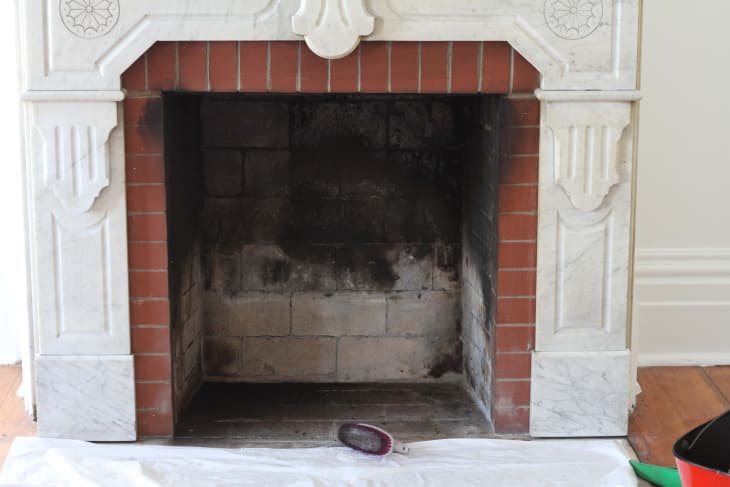
Clean. Clear out any leftover debris and clean like it’s your favorite pastime. We’ve got an article here on how to get rid of the gunk, without using harsh chemicals.
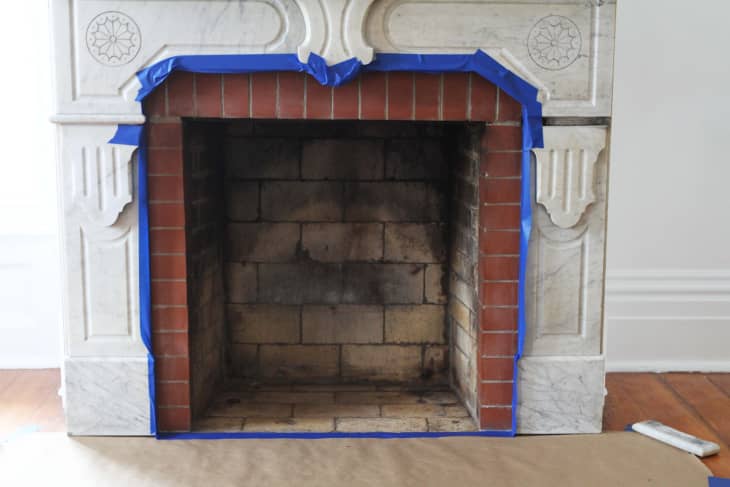
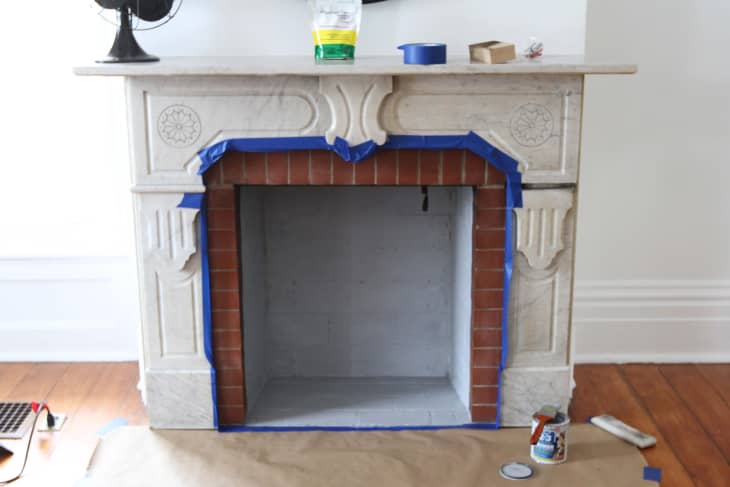
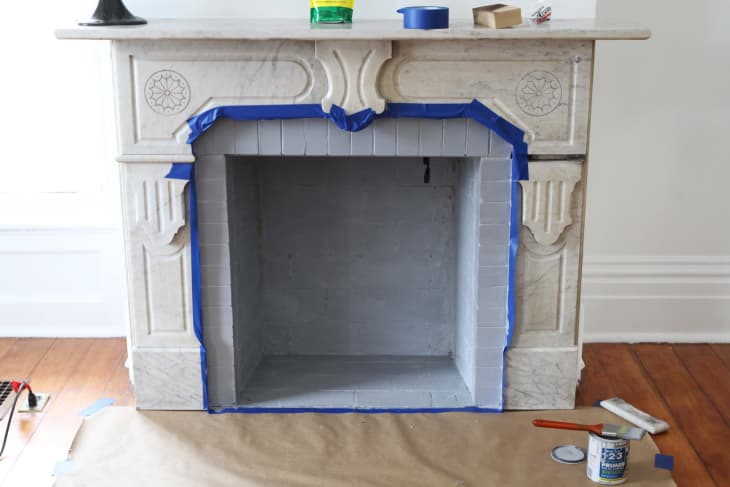
Prep. Use the widest painters tape you can find and tape off any areas that you don’t want painted. In my case it was marble, in yours it could be the wall behind the brick. Lay out a drop cloth, or paper around the area where you will be working to protect the floor and catch any paint that strays.
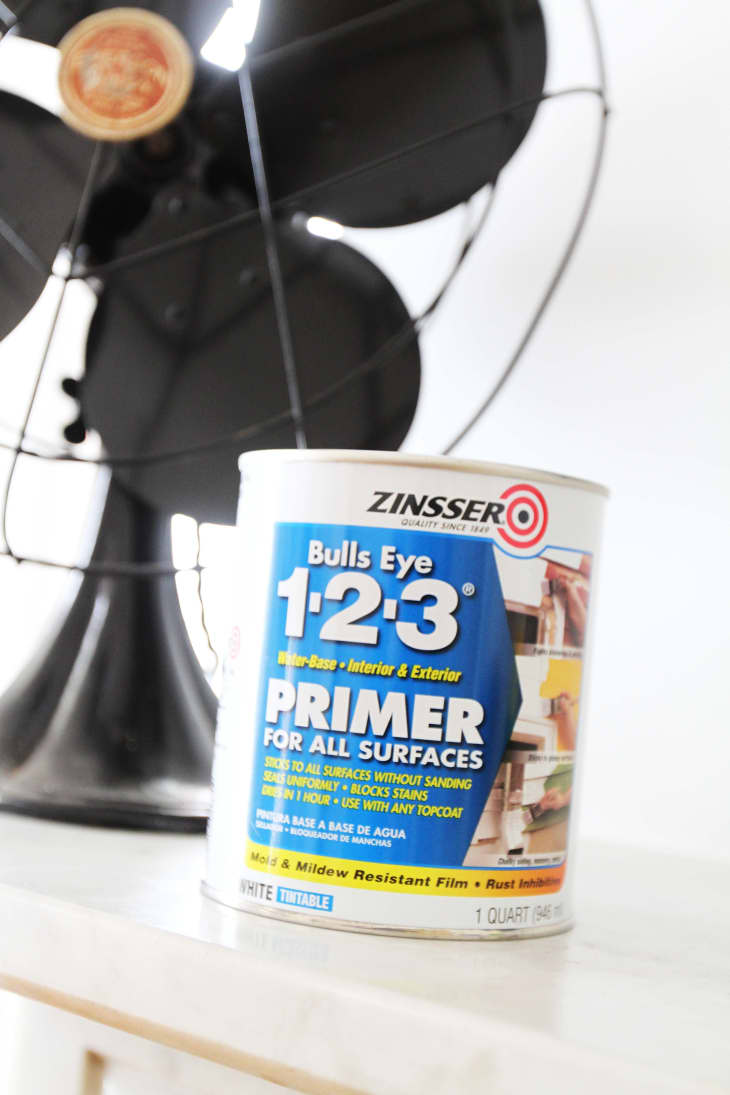
Prime. Our fireplace is out of commission for good, so I wasn’t worried about choosing a high heat primer and paint. I chose to use the primer specifically because of its stain blocking qualities because as much as I scrubbed, the interior just wouldn’t come clean —and at that point I couldn’t decide on painting the interior light or dark.
If you plan to burn in your fireplace, you’ll want to choose a paint such as this Brick Base Coat or another similar product.(In my research I found quite a few people who used high heat grill paint from Rust-oleum without issue, but it’s important to note the company does not advertise it for that specific use.)
Dive in. Start painting the very back of the fireplace first, then work your way out. Outline the borders and corners, and start to work your way down and in towards the middle of each wall. Next, hit the sides. Save the outer part of the fireplace for last.
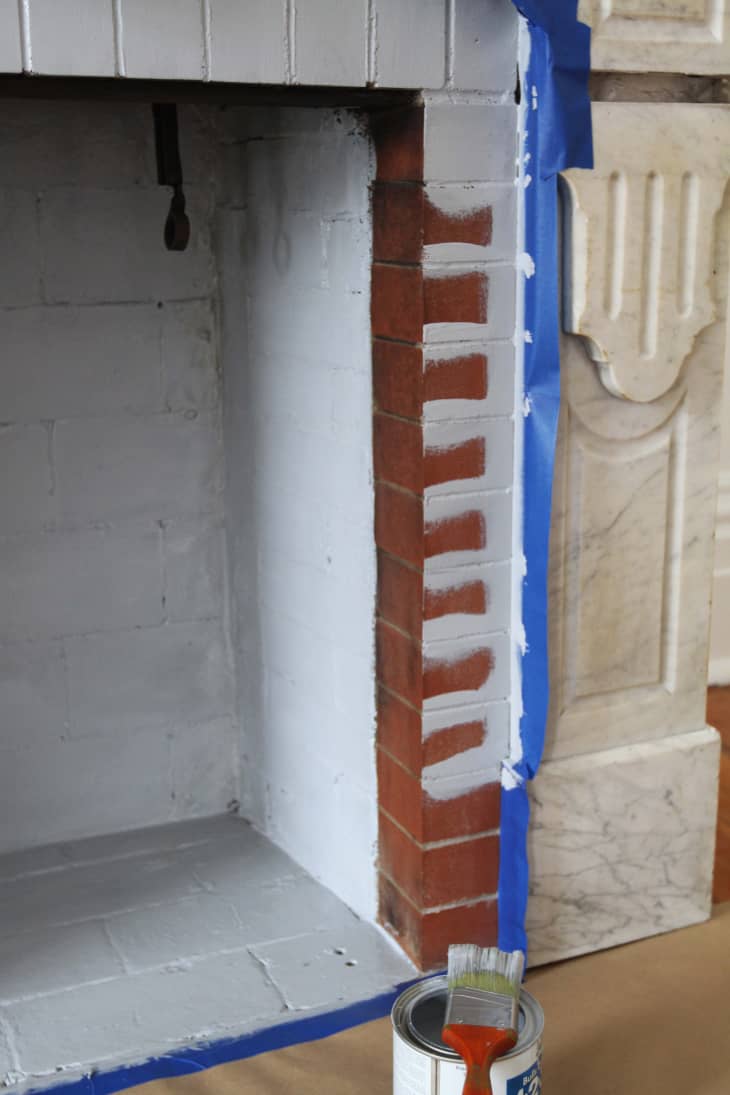
Get into the groove. Get down into the grooves of the mortar joints with your paintbrush. Don’t worry about perfect brush strokes at this point, just make sure to cover the entire surface. I don’t even bother with a roller brush this early in the game — your paint brush will allow you to get back into all the corners and cover all the uneven areas.
If you accidentally pick up some soot on your brush, don’t worry, it’s just your primer coat. Wipe off the brush and try to remove the smudge from the wall with a paper towel. If it’s a really bad smudge, just wait for the paint to dry and put another layer of primer over that area.
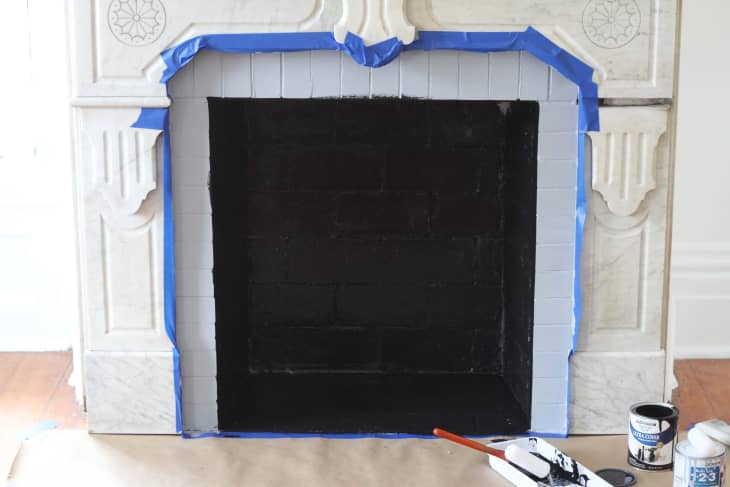
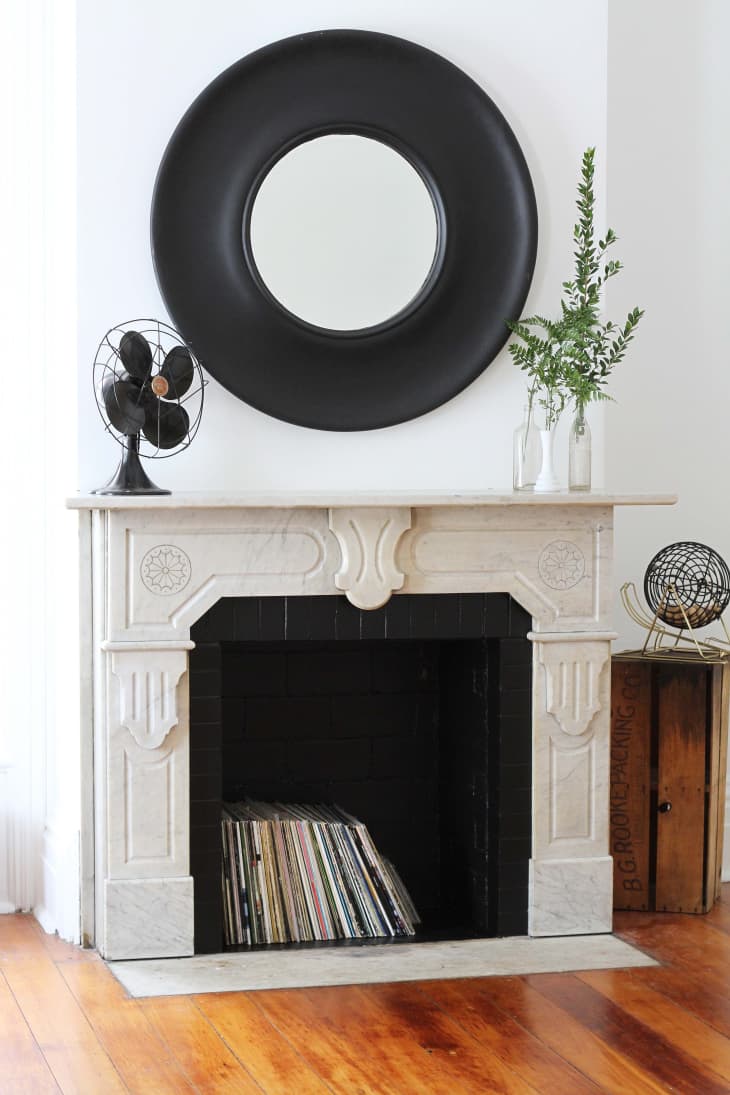
Paint it black. Or any other color you choose, of course! Start with the back, get in the corners and work your way forward. Keep your brush in hand, don’t even worry about your roller yet. If your topcoat is darker than your primer you’ll want to be sure you get the brush into all the grooves and any pitted areas for complete coverage.
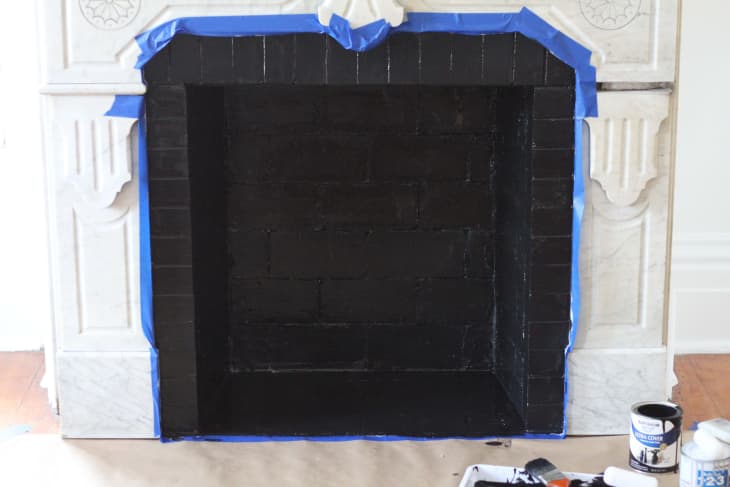
Repeat. After your first topcoat dries, give it one more coat, this time with the roller for a nice, even finish.
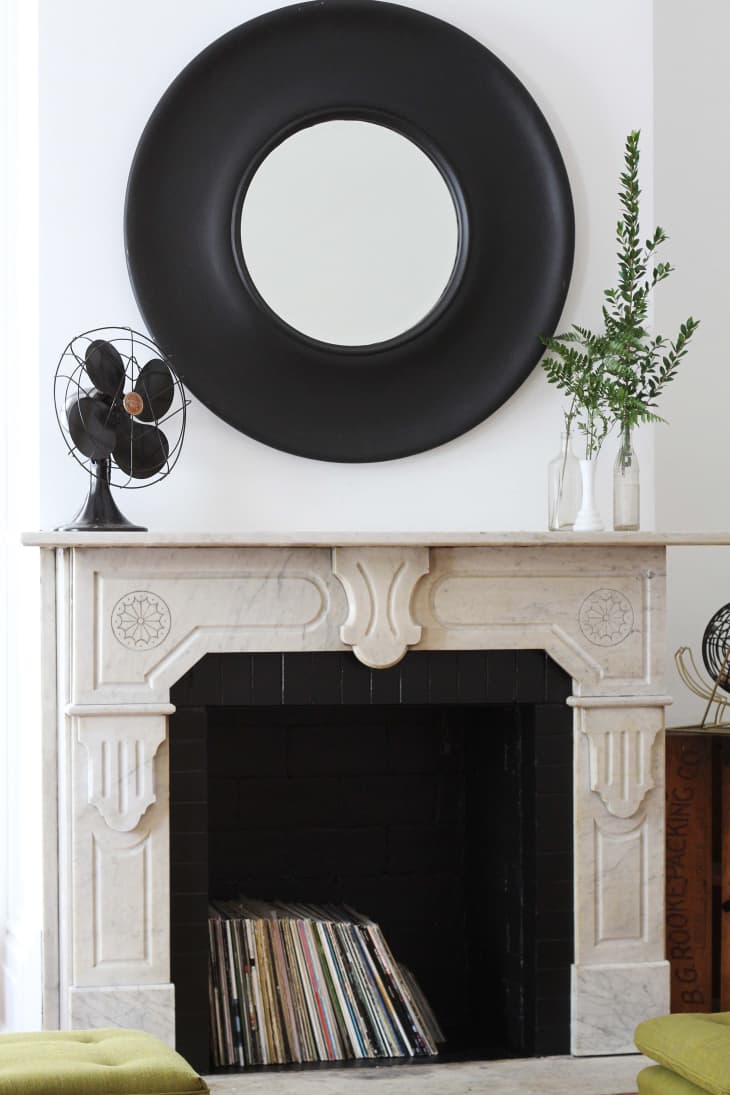
Remove your tape and step back to admire your work! It’s a simple project that takes time and effort, but the results are so worth it!
Have a really great DIY project or tutorial that you want to share with others? Let us know! We love checking out what you’re making these days, and learning from our readers. When you’re ready, click here to submit your project and photos.