By
By

I hope you don't use spot bonding or "five spotting" when installing ceramic tile. It's a problem that's high on the list of failure questions received by the CTEF offices when things go wrong.
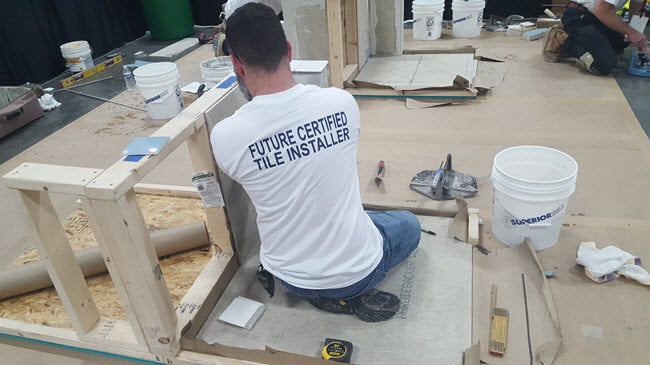
It’s also one we featured at Coverings 2018 in the Installation Experience Hall of Failures.
In case you didn't read How to Correctly Trowel Mortar When Installing Tile? or you still think it's okay, let's review in detail why you need to eliminate even the thought of using spot bonding for your ceramic tile installation projects.
Table of Contents
What do I mean by ‘spot-bonding?
Spot bonding creates bare spots or voids under the tile
Spot bonding ceramic tile leads to three major problems
Is spot-bonding on walls allowed in the TCNA Handbook?
Eliminate five spotting from your ceramic tile installation methods!
What do I mean by 'spot-bonding'?
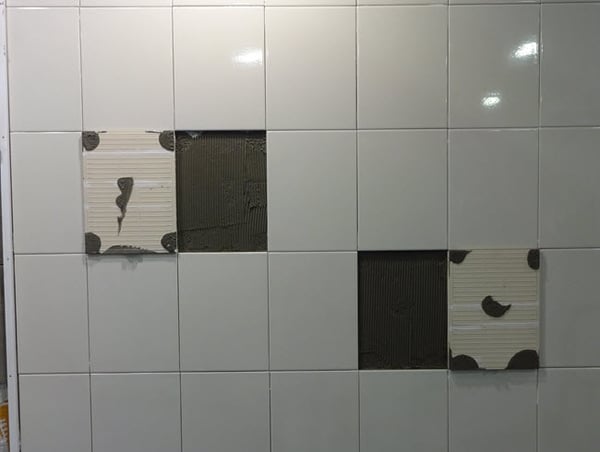
Spot bonding either floor or wall tile places a glob or dollop of mortar (about the size of a golf ball) on the back of the tile. Doing so with larger-sized ceramic tiles means placing a glob of mortar on each corner with one in the middle of the back of the tile which is commonly known as “five spotting.” This process fails every time because the tile is not supported or bonded by the mortar to the substrate.
Most times, the installer makes no attempt to key (physically force) the mortar into the back of the tile with the flat side of the trowel. This results in a questionable mechanical bond. The tile is then placed onto a dry, unclean, un-mortared substrate which doesn't encourage any type of mechanical bond to this surface which is absolutely essential.
>> See The Tile Installation Experience with Scott Carothers at Coverings
Whatever term is used, spot bonding or five spotting, this trick compromises every industry-recognized recommendation for the proper installation of tile. It does not follow the established and proven tile installation methods detailed in the TCNA Handbook and the ANSI Specifications.
Let's be clear:
Although various tile installation methods are used in different parts of the country (which may or may not be included in the TCNA Handbook) and may function without problems, spot bonding tile is not one of them.
Here's why.
Spot bonding creates bare spots or voids under the tile
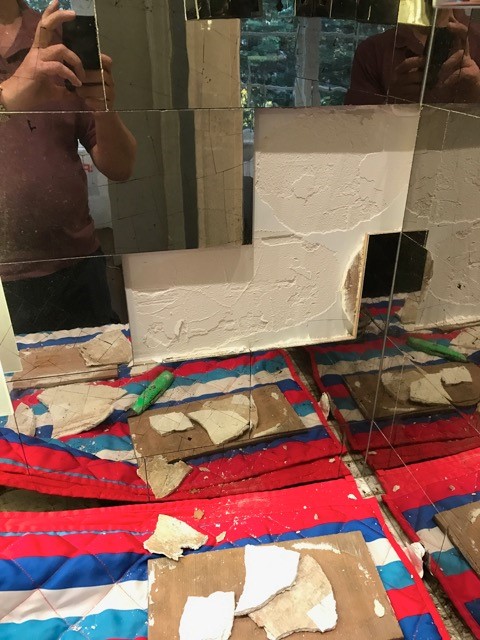
Here is one of the many downfalls to the spot bonding method: bare spots or voids.
As you can see in the image below where the installer used spot bonding, there are bare spots in between the blobs of mortar. The installer “thought” he or she was getting good coverage. Clearly, it's not the case.

Mortar voids such as these in floor tile installations are fatal to the tile installer. They create hollow-sounding tile or even worse, broken tile.
Imagine a refrigerator or piano being rolled across this void area (that's where the white blobs are in the image above). This is a broken tile waiting to happen.
And, on walls in wet (shower) areas, mortar voids normally trap water which will slowly bleed out through the cementitious grout joint causing a temporary discoloration or dark joint. Although the discoloration goes away, most consumers find this unacceptable. As a homeowner, I would, too. The bad part of this situation is that the dark joints will return every time the shower is used.
Spot bonding ceramic tile leads to three major problems
The reason installers use spot-bonding to install floor tile, especially for large format, is that it virtually eliminates lippage (one tile higher than the one adjacent). With the mortar concentrated in these five areas, the installer can easily push down on the mortar spot and get it to flatten out with the adjacent tiles. Continuing to push down on the other three corners usually yields a lippage-free installation. Life is good, right? Wrong!
This mistake creates a number of problems which many times will be cause for a callback and/or potential failure.
- The number one problem caused here is the lack of support for the tile. Any point load, including a woman’s high heel, will cause the tile to crack.
- The second problem occurs when a hollow sound is detected in the area which has no mortar underneath. This is not acceptable.
- The last problem occurs when moisture collects in these hollow areas causing the grout to remain dark until the water has completely evaporated. If the tile is a natural stone, the moisture could permanently discolor the stone, not to mention the grout.
Although spot bonding with mortar may be easier to set tiles flat to each other during the installation, it’s only a matter of time before just the slightest force causes a failure!
Eliminate spot bonding! It is simply not recommended for installing tile.
Is spot-bonding on walls allowed in the TCNA Handbook?
Yes, but there are only four approved methods in the Handbook. Each one uses a very specialized epoxy mortar designed for interior wall applications, only in dry areas.
These TCNA Handbook methods include:
W215: Ceramic Tile over Masonry or Concrete
W260: Ceramic Tile over Cement Backer Board on Wood or Metal Studs (shown below courtesy of the Tile Council of North America)
W215 STONE: Natural Stone Tile over Masonry or Concrete
W260 STONE: Natural Stone Tile over Cement Backer Board on Wood or Metal Studs

Each of these four methods uses an epoxy mortar which is recommended by the manufacturer specifically for spot bonding while also following the epoxy manufacturer’s coverage requirements. These methods are designed to be used only on interior walls that are located in dry areas. The use of the spot-bonding method was NEVER designed or recommended for floor tile installations. Further, the "Limitations" section of these methods states: Will not withstand impact.
If installed over wood or metal studs, the maximum stud spacing is 16” on center.
The approved method for installing wall and floor tile requires keying the mortar into the entire substrate
According to the ANSI Specifications, Section A108.5-2.2.2 describes the approved method for installing floor and wall tile as follows,
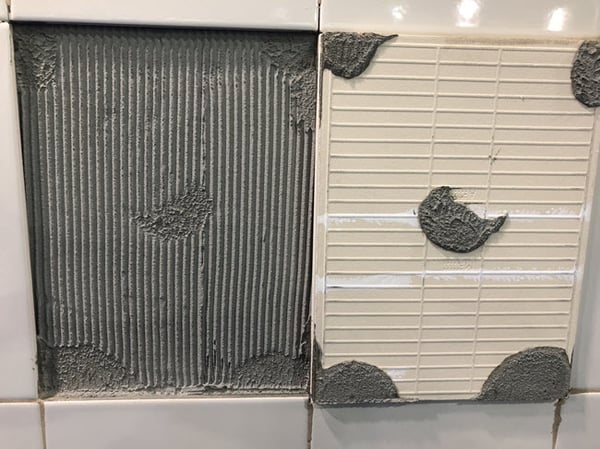
“Apply mortar with the flat side of the trowel over an area no greater than can be covered with tile before the mortar skins over. Using a notched trowel of the type recommended by the mortar manufacturer, comb mortar to obtain an even setting bed without scraping backing material. Cover surface uniformly with no bare spots and with sufficient mortar to insure a minimum mortar thickness of 3/32” (2 mm) between tile and backing after the tile has been beaten into place. Tile shall not be applied to skinned-over mortar.”
Using the above ANSI method, the mortar is keyed into the entire substrate yielding a good mechanical bond with no bare spots.
Spot bonding doesn't even come close to these industry-approved methods.
Reader Questions & Answers
Since publishing this article in 2006, we received the following questions:
Spot-bonding and 95% Coverage
Quinde Falcone asks,
Is spot bonding ok if you achieve 95% coverage? If not, why?
Scott responds,
No, spot bonding is not okay. As stated above, the ANSI specification requires that mortar be keyed into the entire substrate to achieve an adequate bond. Secondly, achieving 95% coverage on the back of the tile is difficult if not impossible. Controlling the thickness of the applied mortar using the spot bonding trick is hard to do and won’t be a consistent thickness, not to mention time-consuming.
Using the recommended key in and the proper notched trowel in straight lines method will ensure an even amount of mortar, and adequate coverage, in less time.
Spot-Bonding Tile in the Real World
Justin Cain comments,
I would like to bring up a few things. How can you say that you can spread a 3/8 trowel or even a 3/4 trowel on these poorly built walls and floors in our world today? 2mm with a 5 mm divet does not work. Not too many people want you to rip their walls back down and crown boards and so on. How can you make money redoing other people’s work so that spreading a trowel is possible? I have ripped out plenty of tile where an installer has only spread a trowel and really had no coverage in the middle or some were on the tile. I think the biggest problem is tile installers are not mixing thinset properly.
But for sure I will spot bond tile over not feeding my kids. In your perfect world where walls, floors, and tiles are perfect, spreading a 3/8s trowel may work. Spread a 3/8s trowel and drop a few plank tiles in and let's see what you get. Not taking anything personally but your article makes zero sense in the real world of laying tile. And competing with labor brokers that send guys out and pick up checks. The only time I get to spread trowel and it works Is when I install a wet bed. My usual way of setting is flat troweling the substrate hitting it with a 1/4 inch trowel and spot 10-12 blobs and working them in and I have had no issues. Large formats I constantly pull them up and check coverage. That's just my 2 cents didn’t mean to insult but if I did I apologize.
Scott’s response:
Justin, no insults received and no apologies are necessary. Please understand that I have been on my knees and have seen the site conditions you mentioned, but please allow me to start at the beginning of your statement.
As to poorly built walls and floors in our world today, the easy answer would be to tell you to walk away from this job and allow someone else to own the failure. But there is an alternative. Insist that the wall or floor be flat per the industry requirement of 1/8” in 10’ for large format tile (one side is 15” or longer). It may be possible to have the general contractor (GC) “fix” the surface, but I have found that the better method is to do it yourself. You are the best one to provide a surface on which you can properly install tile. The key point is that you should be getting paid for this work. If not, you may be working for the wrong contractor.
As to redoing other installers’ work, just walk away. I have been down that road many times and it took me a while to realize that once I touched the mistake done by someone else, I owned it….forever. Don’t accept failures created by an ill-trained tile placer (not a true installer) who was required to do what the GC said. While this type of work may feed your kids for a while, it will haunt you for a really long time. Realize that you are being asked to fix the mistakes of others. If you allow the GC to tell you how to install tile by spot bonding (the wrong way in order to save time??), your work will also fail. The only difference is that the GC no longer uses you because your work failed and has found a new “you” to fix the problem. The cycle is endless.
The real dilemma here is that the GC is giving you a lousy floor or wall surface and you apparently are saying, “Okay, I will set tile on it.” The old saying, “You tile it and you own it” is true as I said in the last paragraph. Again, if the surface is flat, many times you will be able to use a 1/4” x 3/8” trowel and be successful. If that trowel does not provide enough mortar coverage, try others such as 1/4” x 1/2”, the 60° slant notch, or the zipper trowel. If your supplier doesn’t carry them, ask for them. If you hit a dead-end, look on the web.
We are not going to be able to solve this problem in this blog article, but the issue is that the world is providing bad surfaces and too many installers are covering them. If more installers would stand up and say, “No, I am not doing it”, the GCs would get the idea that things have to change, for the better.
I do not live in a perfect world, never have, and didn’t mean to imply that I do. What I am trying to do is help installers like you by giving you a fighting chance to do a better job and get paid fairly for doing it. The TCNA Handbook and ANSI Specifications provide guidelines and requirements that will support what I have said in my response to you. Those books can be your best friend. Use them to your advantage.
Eliminate five spotting from your ceramic tile installation methods!
If you consider yourself a serious and professional tile installer, save yourself time, trouble, and possibly financial loss by using the industry-recommended method to spread your mortar. It should provide the necessary mortar coverage and keep problems away from your door and the money you have earned in your pocket where it belongs.
- Properly clean the substrate and dampen if needed
- Properly key in your mortar to the substrate with the flat side of the trowel
- Comb the mortar in one direction
- Place the tile into the mortar moving it in a back and forth motion, perpendicular to the trowel ridges.
Here are a few additional resources that discuss the pitfalls of spot bonding ceramic tile:
- Is Spot-Bonding Tile an Acceptable Installation Method?
- Marble tile Bathroom fail, Shower Repair. How not to install tile. (3:31 minute video)
- Spot Bonding—What Are the Drawbacks When Installing Tile or Stone?
Let me know in the comments about situations you've encountered related to spot bonding when installing ceramic tile.
Scott

Note: This article was originally published on July 5, 2016, updated on 06/05/2018, and further refreshed.